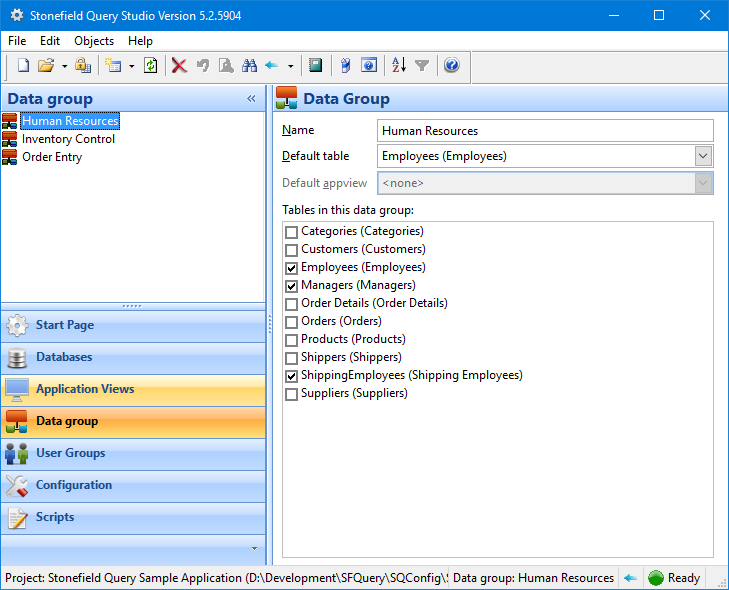
If you have a lot of tables, you may wish to group them. For example, an accounting application may have different modules, such as General Ledger, Accounts Payable, and Accounts Receivable. Rather than making the user select from hundreds of tables in the Step 2 of the report wizards, if you group your tables, they can select which data group they want to work with in Step 1, and then only see the tables in that group in Step 2 (they can also choose "All" to see all tables).
A table can belong to more than one data group. For example, the Customers table in an accounting system might belong to the Accounts Receivable data group, but also the Order Entry data group. Place a table in as many data groups as makes sense for your users.
Data groups can also be used for security purposes; the Maintain Users and Groups dialog (available from the Tools menu in Stonefield Query) allows an administrator to restrict access to certain data groups on a role-by-role basis.
The phrase "data group" can be replaced with one that is more meaningful to your users if you wish, such as "module." The Description for data groups configuration setting determines what text is displayed for data groups, both in Stonefield Query and in Stonefield Query Studio.
Before you can select which data groups a table belongs to, you have to define some. To do so, choose the Create Data Group function from the Objects or shortcut menus or from the drop-down menu of the Create button. You can also click the Create button when the Data Groups panel is selected.
The function name and panel appear using the phrase you specified in the "Description for data groups" configuration setting.

After creating a data group, enter the name for the group. Since these names are only used internally in Stonefield Query and not for queries against the database, you don't have to worry about delimiters for names containing spaces or other characters. You are not allowed to leave the name blank or enter a duplicate name.
You can select the tables that belong to a data group by either turning on the checkmarks in front of the appropriate tables when the data group is selected or selecting a particular table and indicating which data groups it belongs to. Turning on or off the checkmark for a database turns on or off the checkmark for all tables in that database.
You can define the default data group for new reports if you wish. When the user creates a report, that data group is selected by default in the Report Wizard.
You can define the default table and application view for a data group. When the user selects the data group in Step 1 of a report wizard, the table you specify in the Default table setting is automatically selected for a new report in Step 2 if Database view is selected or the application view you specify in the Default appview setting is automatically selected if Application view is selected.
Application views only available in the Ultimate version of Studio.
© Stonefield Software Inc., 2025 • Updated: 06/01/18
Comment or report problem with topic
 Creating a Data Group