This tutorial shows how to create a version of Stonefield Query that can report on both local and remote SQL Server databases. The remote database is accessed over HTTP using Microsoft SQLXML. This tutorial assumes you completed the "creating a project" tutorial for either Access or SQL Server and that project is open in Stonefield Query Studio.
If you have not already configured SQL Server for SQLXML, download and install SQLXML 3.0 from the MSDN Web site (http://msdn.microsoft.com; do a search for "SQLXML" and then choose the download link).
Set up an IIS virtual directory. First, create a folder on your system called NorthwindTemplates, and a subdirectory of it called Template. Next, choose the Configure IIS Support shortcut in the SQLXML 3.0 folder under Start, Programs in your Windows Taskbar. Expand the node for your server, choose the Web site to work with, and then right-click and choose New, Virtual Directory. In the General tab of the dialog that appears, enter "Northwind" as the name of the virtual directory and NorthwindTemplates for its physical path.
In the Security tab, enter the appropriate information to access SQL Server.
In the Data Source tab, choose the server and select the Northwind database.
In the Settings tab, choose the desired settings, but at a minimum, turn on Allow template queries.
In the Virtual Names tab, choose "template" from the Type drop-down list and enter "template" for the virtual name and physical path (which should be a "Template" subdirectory of the virtual directory) to use for templates. Click OK.
To test that everything is set up correctly, create a text file named GetAllCustomers.xml in the Template subdirectory with the following content:
  <root xmlns:sql="urn:schemas-microsoft-com:xml-sql">
    <sql:query client-side-xml="0">
       SELECT *
       FROM   Customers
       FOR XML AUTO
    </sql:query>
  </root>
Then bring up your browser and type the following URL: http://localhost/northwind/template/getallcustomers.xml. You will see something like the following:
In Stonefield Query Studio, select the Northwind database in the TreeView.
Click the Create "get data sources" script link in the properties pane; this creates a new script called Northwind.GetDataSources and selects that script.
Select VBScript for the language and enter the following script:
VBScript
function Main(Application, Database)
dim DataSource
set DataSource = Database.DataSources.AddItem("ODBC", _
  "Local Data")
DataSource.Driver   = "SQL Server"
DataSource.Database = "Northwind"
DataSource.Server   = "server"
DataSource.UserName = "sa"
DataSource.Password = "password"
set DataSource = Database.DataSources.AddItem("SQLXML", _
  "Remote Data")
DataSource.URL = "http://localhost/northwind" & _
  "/template/getallcustomers.xml"
Main = true
end function
Insert the server name in place of *server* and the appropriate password in place of *password* in the code above. If you aren't running IIS on your workstation, insert the proper IP address or domain name in place of "localhost."
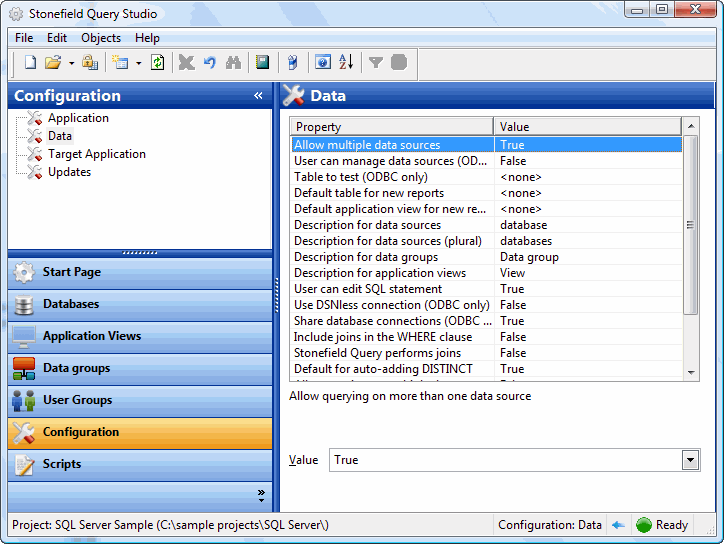
* Click the Configuration panel bar and select Data.
* Select the *Allow Multiple Data Sources* setting and change it to True.

* Click the Launch Stonefield Query button ().
* Select the report you created in the "creating a project" tutorial and run it.
* Select Open Database from the File menu, select the "Remote Data" data source from the list, and click the OK button.
* Run the report again. The results won't be any different since the data is being accessed from the same database in this case. However, notice the remote data version took longer to obtain the data, since it had to go over HTTP to do so.
© Stonefield Software Inc., 2025 • Updated: 06/06/16
Comment or report problem with topic
 Accessing Local and Remote SQL Server Databases