 Step 2: Create a Stonefield Query Project
The second step is creating a Stonefield Query project. A project is a set of configuration files that tell Stonefield Query how it works with the data of a particular application. To do this, start Stonefield Query Studio and click the New Stonefield Query Project button ( ) in the toolbar. Alternatively, you can click the New Project link in the Tasks section of the Start Page. The New Project Wizard appears.
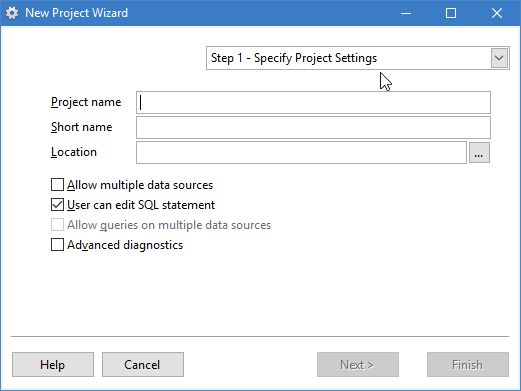
Step 1 of the dialog has the following options:
Project name: enter the name of the application as you want users to see it. Obviously, you can call it "Stonefield Query," but that's not a requirement; you can call it anything you wish, such as "My New Report Writer" or "Inventory Reporting System." The value you enter here corresponds with the Application Name configuration setting.
Short name: this defaults to the name you enter for Project name but is used as an abbreviated name in various places. For example, if you set Project name to "The Northwind Company Reporting System," you may want to use a shorter name like "Northwind Reporting" for Short name. This setting is stored in the Short Application Name configuration setting.
Location: enter the path for the folder in which to create the Stonefield Query project files or click the button to display a dialog to select the folder. The folder is created if it doesn't exist.
Allow multiple data sources: turn this option on if your application has multiple sets of data. For example, accounting applications often allow users to have different sets of data for different companies. See the help topic for the Allow Multiple Data Sources configuration setting for details.
User can edit SQL statement: turn this option on (which it is by default) if you want users to be able to edit the SQL statement for a report.
Turning this on doesn't mean all users can do that; you can configure on a user-by-user basis who has access to that. However, if you don't turn this on, not even you can change the SQL statement for any report. This setting corresponds with the User Can Edit SQL Statement configuration setting.
Allow queries on multiple data sources: this option, which is disabled unless you turn on Allow multiple data sources, determines whether users can create reports that consolidate records from multiple sets of data. See the help topic for the Allow Queries on Multiple Data Sources configuration setting for more information.
Advanced diagnostics: turn this on to create advanced diagnostic files that can help track down problems reading data structures.
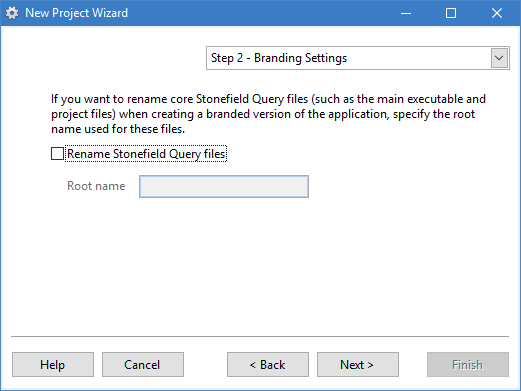
You can create a private labeled or branded version of Stonefield Query by changing a number of configuration settings. This allows you to distribute Stonefield Query as your own branded product, so your end-users won't know it's Stonefield Query from Stonefield Software; they'll think it's something you've created just for them. This also allows you to sell your branded version for whatever price fits your business model. However, it's possible the end-user may still determine that the reporting tool is actually Stonefield Query by the names of some files, such as SFQuery.exe and SQUpdate.exe. If you want to rename core Stonefield Query files, turn on the Rename Stonefield Query files setting in step 2 and enter the "root" name used for those files. For example, if you enter "MyApp,", SFQuery.exe will automatically be named MyApp.exe and SQUpdate.exe will automatically be named MyAppUpdate.exe when the application is installed on a user's system using the setup executable created by the Generate Setup function.
Unlike other reporting and querying tools that have no specific knowledge of a particular database, Stonefield Query has detailed knowledge about the databases it queries against. That's the key to Stonefield Query's ease of use: the users don't have to know what a join is, let alone how to create a join for a particular set of tables, nor do they have to know the names of tables and fields.
What gives Stonefield Query this knowledge about the databases is its data dictionary. The data dictionary has information about the databases themselves (where they are located and how to access them) and their tables (their names and descriptive headings), fields (names, headings, data types, formats, and so forth), and relationships (the expressions used to join pairs of tables).
Filling in the Stonefield Query data dictionary for a database would be a very tedious process if you had to do it by hand. Fortunately, Stonefield Query Studio has a feature to "discover" the metadata for a database. You do this by specifying in Step 2 how to connect to the database you want Stonefield Query to report on. Studio creates the metadata (information about the data structures) for the database and all of its tables, fields, and relationships.
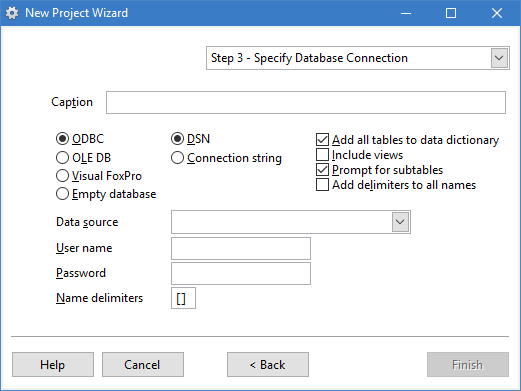
There are four available choices:
ODBC: this choice means you want to use ODBC to read the database information. When you choose this option, you can select how to connect to the database: using a Data Source (DSN) or a connection string.
OLE DB: use this choice if you want to use an OLE DB provider to read the database structures.
Visual FoxPro: choose this option if you want to create metadata for Visual FoxPro data.
Empty database: use this choice to create an empty database that you fill manually. This is used if the database you want to query cannot be accessed by other means, such as if it has an API or if you want to query against a Web Service or text file.
The first option in the dialog is Caption. This is used as the descriptive name for the database the user sees in Stonefield Query.
For ODBC or OLE DB, you can specify which characters to use as delimiters around table and field names that need delimiters (for example, names with spaces in them) in the Name delimiters setting. Specify a two-character value, with the first character being the left delimiter and the second being the right. The default delimiters are "[]," meaning names are delimited with square brackets. If you want name delimiters added to all names, turn on Add delimiters to all names.
If you select ODBC, choose DSN if you have an existing data source for the database. Select the ODBC data source name from the list of defined data sources on your system, and optionally enter the user name and password for the database (you can leave these blank to use a "trusted" connection such as Windows integrated security with SQL Server).
The DSN doesn't have to exist on the end-user's system; it's only used for the discovery process.
If you select ODBC, choose Connection string if you don't have an existing DSN for the database and you're familiar with the format of an ODBC connection string. Enter the connection string to access the database. The string should contain the name of the driver, the database name, the user and password (if they're required), and any other clauses needed by the database. For example, here's a connection string to access the SQL Server Northwind sample database:
driver=SQL Server;server=*servername*;database=Northwind;
    uid=*username*;pwd=*password*
where servername is the name of the server, username is the user name, and password is the password.
If the DSN doesn't exist and you don't want to use a connection string, be sure to create a DSN.
If you select OLE DB, you can either enter the connection string to access the database or click the Build button to display the Windows Data Link Properties dialog, which allows you to visually create the connection string by making the appropriate choices in the dialog.
It's better to select the correct OLE DB provider for your database engine than to use the generic Microsoft OLE DB Provider for ODBC Drivers, since that provider doesn't have all of the features of a specific provider. For example, the ODBC provider cannot read relationships between tables from databases such as SQL Server or Access.
If you select Visual FoxPro, there are three ways you can select the data:
Database container: choose this option if the tables are members of a database container. You're asked to select the database container.
Free table directory: choose this option if you want metadata for the free tables in a specific directory. You can select the directory for the tables. In this case, the database in Stonefield Query will automatically be named "freetables" for the first one, "freetables2" for the second one, and so on. You cannot edit this name.
DBCX metadata: if you have a set of DBCX metadata (for example, if you use Stonefield Database Toolkit) for your data, choose this option and select the DBCXREG table for the data.
Regardless of the choices you've selected, turn on the Add all tables to data dictionary option if you want all tables automatically added to the data dictionary or turn it off if you want to select which tables to add. Turn on the Include views option if you want views included.
The Prompt for subtables option allows you to indicate whether you are prompted for subtable names when multiple relationships are found between tables or a table has a self-join. While this is turned on by default, you may wish to turn it off if you don't plan on dealing with multiple relations and don't want to be prompted for them every time you refresh the data dictionary.
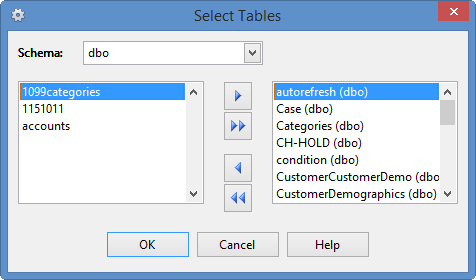
Once you've filled in all the information in the New Project Wizard, click the Finish button. If you turned off the Add all tables to data dictionary option, select which tables you want added in the Select Tables dialog that appears next (views are included if you turned on the Include Views option). If your database has different schemas or user names, an additional drop-down list of the available schemas or user names appears so you can see the tables in the selected one.
Stonefield Query Studio then examines the database structure and creates metadata for all of the tables, views (if you turned on the Include Views option), fields, relationships, and so on. During the process, you can press Esc to cancel it at any time. If any errors occurred while trying to read the structure of the database, an error message appears informing you of this. Otherwise, the database and its tables, fields, and relationships appear in the Database panel of Stonefield Query Studio.
As it creates the metadata for the database, if Stonefield Query Studio discovers any self-joins or more than one relationship between the same set of tables, it stops and informs you that it needs to create a subtable so the relationship can be handled properly in Stonefield Query. This is the dialog that appears for self-joins:

This is the one that appears for multiple relationships:
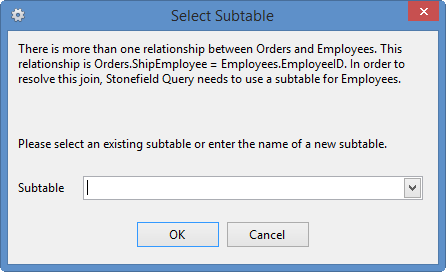
In either case, specify the name of the subtable to create. If there are existing subtables for the table, select one from the drop-down list. See the Creating a Subtable topic for information on subtables.
If you use the Microsoft OLE DB for Oracle provider, you are asked if you want to use the Oracle provider instead. The Oracle provider supports some features the Microsoft provider does not, so it's a good idea to choose Yes.
If you are accessing the IBM iSeries Db2 ODBC driver, be sure to configure your DSN to convert binary data to text on the Translation page of the ODBC setup dialog.
You can specify that a database login dialog should appear when Stonefield Query Studio connects to the database by adding DispLogins=2 to a [Settings] section in SFQEditor.INI (if that file doesn't exist, create it).
Stonefield Query Studio creates the project files and opens them; you're then ready for Step 3.
© Stonefield Software Inc., 2025 • Updated: 12/21/18
Comment or report problem with topic