 Step 4: Formatting Options (Gauge Report)
Step 4 allows you to specify how the gauge appears. There are many options in this step but they are organized into groups.
As you make changes to the various options in this step, the gauge displayed automatically adjusts to show you what the gauge looks like using your settings. However, it does not show actual data from your database until you click the Preview button.
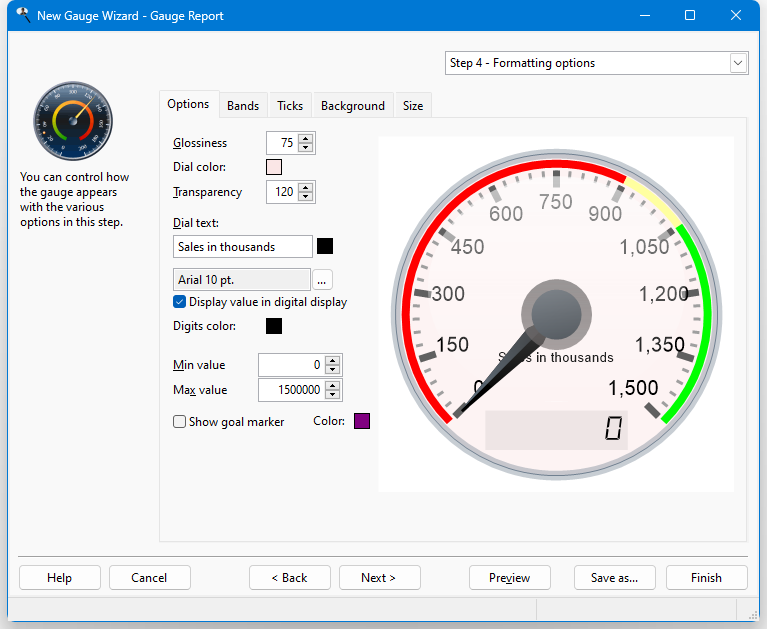
The following options are available on the Options page:
Glossiness: an ellipse appears at the top of the gauge to make it appear shiny. This option determines how "glossy" this ellipse appears. The values are 0 (no shine) to 100 (very glossy).
Dial color: this determines the color of the gauge inside the dial area. To change the color, click the colored square and select the desired color from the dialog that appears.
Transparency: this option specifies the transparency of the dial color. 0 is opaque and 255 is completely transparent.
Dial text: specifies the text, color, and font for the text that appears inside the gauge below the pointer. The default text is the name of the report. To change it, type something different in the text box. Blank the box to display no text. To change the color of the text, click the colored square beside the text and select the desired color from the dialog that appears. To change the font or size, click the button with the ellipsis (...) and select the desired font and size from the dialog that appears. Note that if you select a font script other than Western, the script name (such as "Greek") appears after the font name, size, and style.
Display value in digital display: turn this on to display the current value in a digital display at the bottom of the gauge, similar to the odometer in a car's speedometer. Note there's only room for seven digits in the display.
Digits color: specifies the color of the digits in the digital display. To change the color, click the colored square beside the title and select the desired color from the dialog that appears.
Min value: specifies the minimum value for the gauge. The default is 0.
Max value: specifies the maximum value for the gauge. The default is the goal value if it's specified as a value or 100 if it's a field.
Show goal marker: turn this on to display a diamond shape on the gauge where the goal value is. To change the color of the marker, click the colored square and select the desired color from the dialog that appears.
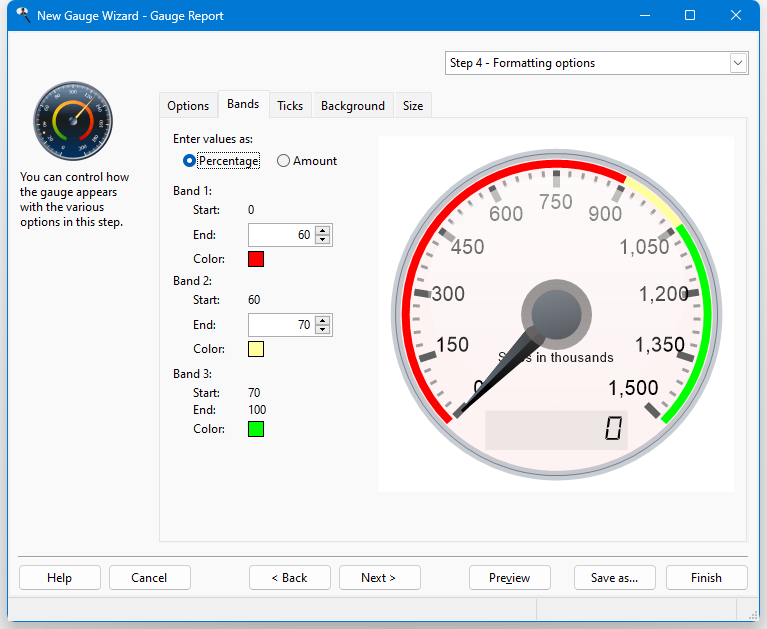
Around the edge of the gauge are three colored bands, indicating a range of values. The Bands page allows you to control the size and colors of these bands. It has the following options:
Enter values as: this option allows you to specify whether the values on this page are in percentage or as amounts.
Start: the starting value for the band. You can't change this value: for band 1, it's 0; for band 2, it's the same as the ending value for band 1; and for band 3, it's the same as the ending value for band 2.
End: the ending value for the band. Start and End together form the range for the band. For example, for band 2, if Start is 40 and End is 70, the section of the gauge between 40% and 70% of the total appears in the color specified for the band. The end value for band 3 is fixed at 100.
Color: the color for the band. To change the color, click the colored square and select the desired color from the dialog that appears.
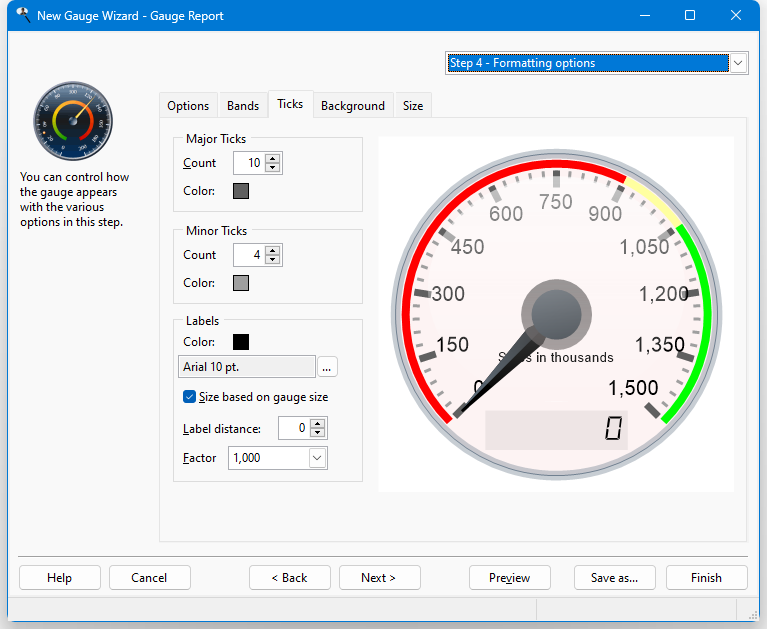
The Ticks page has the following options:
Major ticks: specifies the number and color of the major ticks. To change the color, click the colored square and select the desired color from the dialog that appears.
Minor ticks: specifies the number and color of the minor ticks. To change the color, click the colored square and select the desired color from the dialog that appears.
Labels: specifies the color and font of the labels in the gauge. To change the color, click the colored square and select the desired color from the dialog that appears. To change the font or size, click the button with the ellipsis (...) and select the desired font and size from the dialog that appears. Note that if you select a font script other than Western, the script name (such as "Greek") appears after the font name, size, and style.
Size based on gauge size: if this option is turned on, which it is by default, the font size setting for labels is ignored and instead the font size is based on the size of the gauge: the larger the gauge, the larger the font size. Turn this option off to use the specified font size for labels.
Label distance: the distance of the labels from the major tick marks.
Factor: a divisor for the label values. For example, if you select "1,000" from the list, values are shown in thousands (for example, 125,000 shows as 125). Choose "1" to show the actual values.
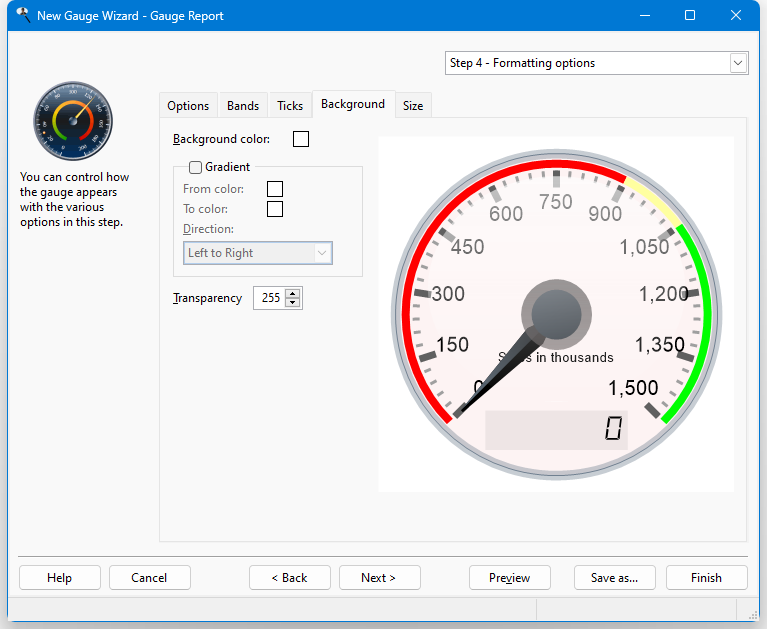
The Background page has the following options:
Background color: this setting, which is only available when Gradient is turned off, specifies the color of the gauge background. To change the color, click the colored square beside this setting and select the desired color from the dialog that appears.
Gradient: turn this setting on to display a gradient of color across the gauge background.
From color: this option, which is only available if Gradient is turned on, specifies the starting color for the gradient. To change the color, click the colored square beside this setting and select the desired color from the dialog that appears.
To color: this option, which is only available if Gradient is turned on, specifies the ending color for the gradient. To change the color, click the colored square beside this setting and select the desired color from the dialog that appears.
Direction: this option, which is only available if Gradient is turned on, specifies in which direction the gradient flows. The choices are Left to Right, Top to Bottom, From Top Left, and From Top Right.
Transparency: this option specifies the transparency amount. 0 is opaque and 255 is completely transparent.
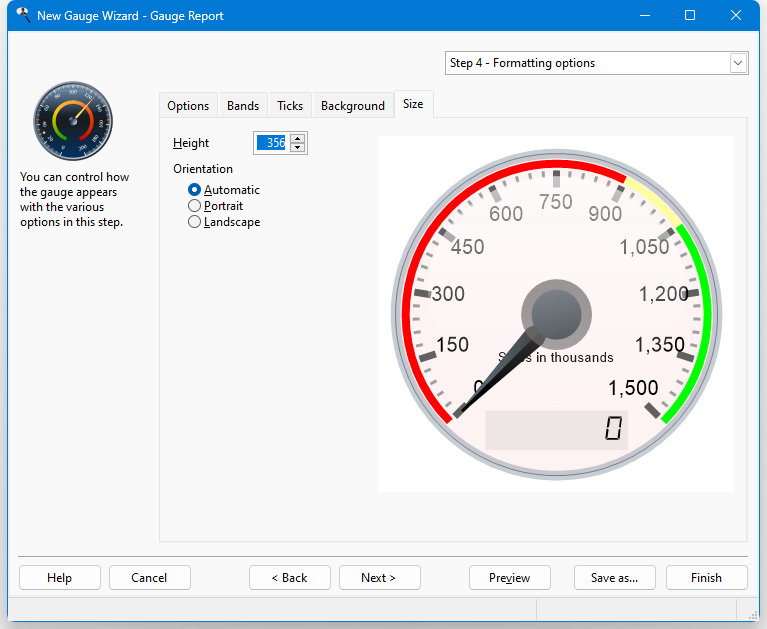
The Size page has these options:
Height: specifies the height (and width, since they're always the same) of the gauge in pixels when it's output.
Orientation: the default choice, "Automatic," means that if the gauge is too wide to fit in portrait orientation, it automatically switches to landscape. However, you can override this by choosing either "Portrait" or "Landscape" to force the report to be printed in the desired orientation.
© Stonefield Software Inc., 2025 • Updated: 03/21/18
Comment or report problem with topic